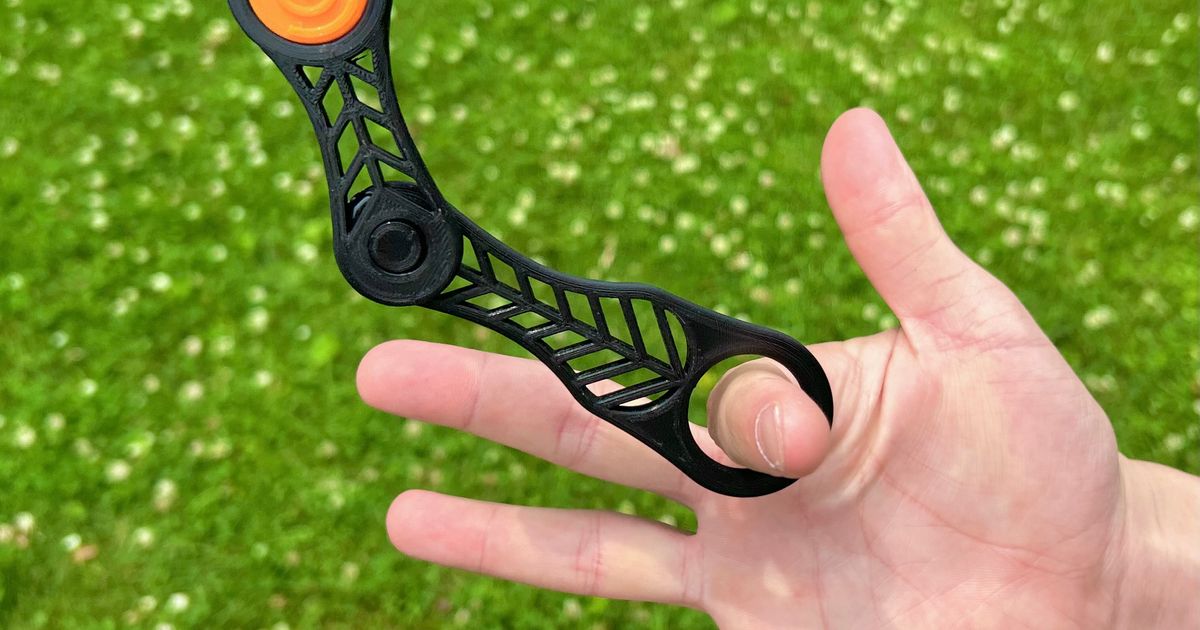
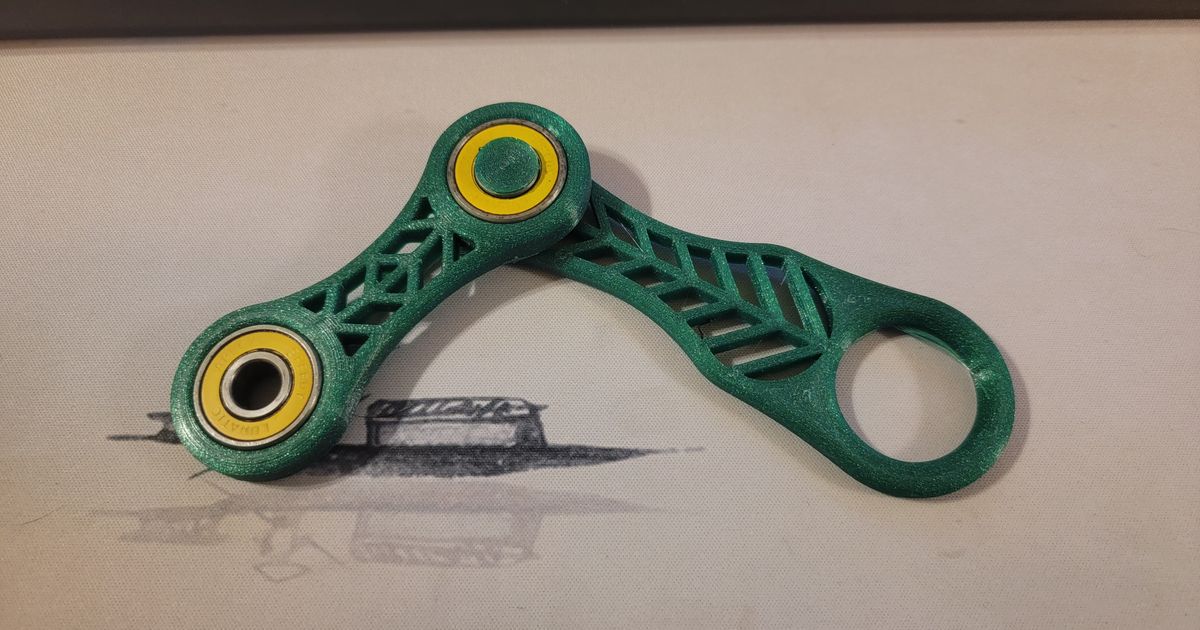
Finger Slinger 2.6 with Bearing Joint


Print Profile(1)

Description
Changelog:
- 7/28/23 : Whoopsies! Discovered glitches.. pulled model parts and advised people to wait
- 7/29/23 : Updated version to 2.6, because the previous “2.5” I made was badly borked :)
- Fixed several kinks in the models and improved matters to make it easy to insert the screw cap with a M5 hex key. Changed recommended printing height to 0.16, fixed several model deficiencies. This should finally be ready to actually use.
- Now includes a ready-to-use 3MF for OrcaSlicer with the modifiers in-place (optional)
I think the 2.0 remix from @Cristobal5050 had the right idea, but it required stopping the print in the middle and inserting a bearing.. which is a bit of a pain and inevitably will lead to rage when i screw it up (at least for me !). Plus it requires changing GCODE manually (yuk!).
Instead of screwing it up.. why not screw it in instead !
I thought that altering the design to have a threaded assembly would perhaps be a better way of accomplishing the intent of using a bearing here. Since I'm working from meshes here I only have 3MFs (meshes) to provide as any STEP would be really ugly. I grudgingly worked from a mesh-to-solid workflow and modified in some threads to hold the bearing in place. If you want to be sure it never unscrews you could add a touch of super-glue at the other side of the threads after assembly.
Printing
I printed in Prusament Transparent Orange PETG, which is good in this case because the slight bit of flex in PETG helps with seating the bearings in place.
Print the two parts with threads at 0.16 layer height if you can in order to get the threads to work nicely. The "Mirrored Slinger" was originally directly cribbed from @Cristobal5050's remix. However I discovered this didn't sit flat on the bed nicely and led to an unfortunate print with a messy bottom. I've remixed this to sit flat on the bed in the improved part.
I recommend the standard length SpinnerPart, but I also offer a longer version.. this may hit your finger though in the grip of the main body.
Going slower around the threads with a wall speed modifier can help too . Minimum layer time should take care of this for the little screw automatically, but you should check speed preview just to be sure. Suggested modifier location:

Assembly Notes
- The threads have tolerances built into them , and the female side has been tapered in , which should help with the initial grab . It would be good to a tiny touch of grease (I use Superlube) and screw in the cap head with the male thread all the way (using some back and forth to loosen) with a M5 hex key BEFORE you friction-fit the cap into a bearing.
- The fit for the M5 hex key may be tight.. this is on purpose for a good solid grip without any rounding. You might need to tap it in gently with a hammer to get it to fit. It should be easy to remove after you screw the cap in.
- The skate bearings are a tight fit. In my print here in PETG, I needed to tap them in with a hammer.
- The cap screw threads will easily pass through the bearing center, but the retaining part is a tight friction fit on purpose and may require some light hammer taps to get through. This is why I recommend making sure the threads are functional first.
- The cap is designed with the male screw bolt with 0.25 mm less length than the female thread hole as a tolerance for any first layer issues. Don't worry if it doesn't go 100% of the way through, there's meant to be a slight gap at the other side. You can see this in my pictures if you look closely.
The threads are modeled on M8 metric sizes , although some of the tolerance adjustments for printability may make them not work if you try an M8 metal screw.. I have not tried one , but it might work instead !
Enjoy!